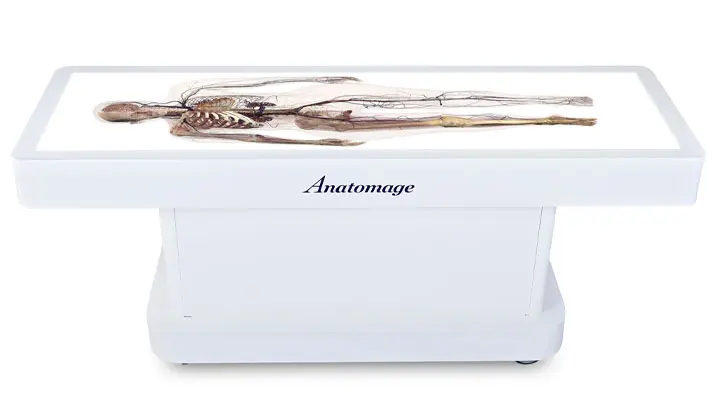
What is Anatomage Table EDU (Free demo)?
Anatomage Table EDU (Free demo) is an innovative educational tool designed for students and educators in the field of anatomy and health sciences. This cutting-edge platform provides an immersive and interactive learning experience, allowing users to explore the human body in 3D. With its robust features and user-friendly interface, Anatomage Table EDU (Free demo) has become a popular choice among educational institutions and professionals.
Main Features and Benefits
The Anatomage Table EDU (Free demo) offers a wide range of features that make it an indispensable tool for anatomy education. Some of its key features include:
- Interactive 3D models of the human body
- Realistic simulations of various medical procedures
- Customizable lesson plans and assessments
- Collaboration tools for students and educators
Installation Guide
Installing Anatomage Table EDU (Free demo) is a straightforward process that can be completed in a few steps.
System Requirements
Before installing the software, ensure that your system meets the following requirements:
- Operating System: Windows 10 or macOS High Sierra (or later)
- Processor: Intel Core i5 or AMD equivalent
- Memory: 8 GB RAM or more
- Graphics: NVIDIA GeForce GTX 1060 or AMD Radeon RX 580 (or equivalent)
Step-by-Step Installation
Follow these steps to install Anatomage Table EDU (Free demo):
- Download the installation package from the official website
- Run the installer and follow the prompts
- Accept the terms and conditions
- Choose the installation location and click Install
- Wait for the installation to complete
Technical Specifications
Anatomage Table EDU (Free demo) is designed to provide a seamless and efficient learning experience. Here are some of its technical specifications:
File Import and Export
The software supports various file formats, including:
- OBJ
- STL
- FBX
Offline Repository Setup
To ensure data safety and backup, Anatomage Table EDU (Free demo) allows users to set up an offline repository.
Follow these steps to set up an offline repository:
- Go to Settings > Repository
- Click on Create Offline Repository
- Choose a location for the repository
- Set up the backup schedule
Pros and Cons
Like any software, Anatomage Table EDU (Free demo) has its advantages and disadvantages.
Pros
Some of the benefits of using Anatomage Table EDU (Free demo) include:
- Interactive and immersive learning experience
- Customizable lesson plans and assessments
- Collaboration tools for students and educators
Cons
Some of the drawbacks of using Anatomage Table EDU (Free demo) include:
- Steep learning curve for beginners
- Requires high-performance hardware
FAQ
Here are some frequently asked questions about Anatomage Table EDU (Free demo):
Q: Is Anatomage Table EDU (Free demo) compatible with my operating system?
A: Yes, Anatomage Table EDU (Free demo) is compatible with Windows 10 and macOS High Sierra (or later).
Q: Can I import my own 3D models into Anatomage Table EDU (Free demo)?
A: Yes, Anatomage Table EDU (Free demo) supports various file formats, including OBJ, STL, and FBX.
Q: How do I set up an offline repository for backups?
A: Go to Settings > Repository, click on Create Offline Repository, choose a location, and set up the backup schedule.